

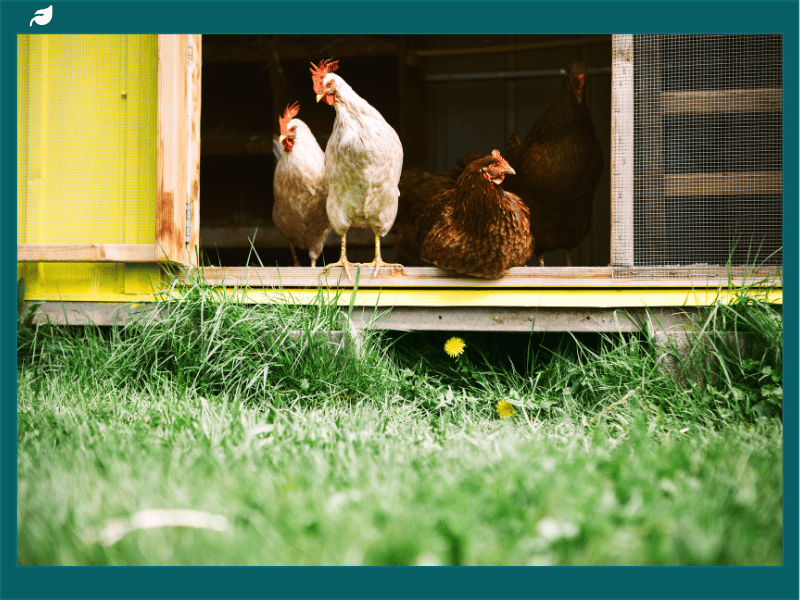
Keeping a backyard flock sounds simple until the daily upkeep starts to pile up. Muddy runs, overflowing waterers, and hard-to-reach corners can turn a rewarding hobby into a weekly chore you dread. The good news? Most of those headaches come from setup decisions made before the first chicken ever steps inside. Get those decisions right from the beginning, and your chicken coop almost manages itself. Here are five backyard setup choices that will save you serious time, effort, and frustration over the life of your flock.
1. Choosing the Right Coop Placement From the Start
Where you place your coop determines how much work you create for yourself every single day. A poor location means wet bedding, pest problems, and a muddy mess that never fully dries out. A smart location, by contrast, keeps the coop cleaner, drier, and far more pleasant to work in.
Prioritize Drainage and Ground Level
Place your coop on slightly elevated or well-drained ground. Low spots collect rainwater, and a coop that sits in standing water breeds bacteria, mold, and flies faster than almost anything else. If your yard slopes, position the coop at the top of the grade so water flows away naturally. A gravel apron around the base also helps redirect moisture before it soaks under the structure.
Factor In Sun and Shade Throughout the Day
Sunlight matters more than most first-time keepers realize. Morning sun helps dry out overnight moisture from droppings and breath, which cuts down on ammonia buildup inside the coop. But, too much afternoon sun in summer can overheat your flock. Aim for a spot that gets good eastern exposure with some natural shade on the western side, whether from a tree, fence, or the coop’s own overhang.
Consider Access Paths for Daily Tasks
Think about how you will physically reach the coop every day in every season. A coop tucked behind landscaping or at the far edge of the yard sounds charming until you are hauling feed through knee-deep snow. Place the coop close enough to a clear, firm path so that daily feeding, egg collection, and spot cleaning stay quick and straightforward. For example, VEVOR metal chicken coop and similar ready-built units have a structure designed with practical access in mind, which means this type of layout is built in a way to support smart placement decisions from day one.
2. Installing a Droppings Board or Pull-Out Tray for Easier Cleaning
Chickens produce an enormous amount of waste overnight. Without a system to catch and remove it quickly, droppings accumulate under roosts and turn into a smelly, ammonia-rich layer that harms your flock’s respiratory health. A droppings board or pull-out tray is one of the highest-return additions you can make to any coop setup.
How a Droppings Board Works
A droppings board is a flat surface installed directly below the roosting bars. Since chickens sleep on roosts and drop waste straight down, the board intercepts almost all of the overnight mess before it hits the coop floor. You simply scrape the board clean each morning, which takes less than two minutes and keeps the main floor bedding far cleaner for longer.
Pull-Out Tray vs. Fixed Board: Which to Choose
Fixed boards work well in coops with plenty of interior height, but pull-out trays offer an advantage in tighter spaces. A pull-out tray slides out from the coop’s exterior, so you never have to step inside to clean the highest-waste area. This setup is especially useful in prefabricated coops where the interior dimensions are fixed. If you have the option to choose, a tray with a shallow lip on all four sides prevents spills during removal.
Lining and Maintenance Tips
Line your droppings board or tray with a thin layer of sand, food-grade diatomaceous earth, or a simple sheet of vinyl flooring. Each of these materials lets waste dry out faster and scrape off cleanly. Refresh the lining completely once a week, and do a full board scrub with diluted white vinegar every month to keep odors low and surfaces hygienic.
3. Designing a Run With the Deep Litter Method in Mind
The run is often the dirtiest part of a backyard chicken setup, yet it does not have to be. If you design it with the deep litter method in mind from the start, you can create a self-managing system that requires far less frequent clean-outs.
What the Deep Litter Method Actually Involves
The deep litter method layers organic material, such as wood shavings, straw, or dried leaves, and allows beneficial microbes to break down droppings over time. Instead of cleaning the run constantly, you add fresh material on top as layers accumulate. Chickens scratch and turn the litter naturally, which aerates it and speeds up decomposition. The result is a composting system right inside your run that controls odor and reduces pathogens.
Run Size and Surface Material Matter
For the deep litter method to work, your run needs enough square footage to prevent litter from compacting too quickly. A minimum of ten square feet per bird gives them room to scratch effectively. As for surface material, avoid concrete or solid flooring directly under the run. Natural soil or a sand base allows for better microbial activity and drainage, both of which keep the deep litter system productive.
Managing Moisture in the Run
Excess moisture is the number one reason deep litter systems fail. A covered or partially covered run prevents rain from soaking the litter and shutting down microbial activity. Even a simple, clear polycarbonate roof panel over part of the run makes a significant difference. Plus, avoid placing water stations over the litter. Spillage from waterers is a common source of wet spots, so position them over a gravel pad or near the run’s edge instead.
4. Setting Up an Automatic Waterer and Feeder System
Manual feeding and watering is where daily chicken chores eat up the most time. Switching to automatic systems cuts your daily coop visit from twenty minutes down to a quick five-minute check, and it also reduces the waste and mess that come with open containers.
Automatic Waterers: Nipple vs. Cup Style
Nipple waterers connect directly to a bucket or PVC pipe and deliver water only when a chicken pecks the trigger. They stay far cleaner than open bowls because chickens cannot step in them, scratch debris into them, or drop feed inside. Cup-style waterers are similar but hold a small pool of water in a shallow cup, which some chickens prefer. Both styles reduce spillage dramatically compared to standard waterers, which makes them a natural fit for coops using the deep litter method.
Gravity-Fed Feeders Reduce Daily Refills
A gravity-fed tube feeder holds several days’ worth of feed and dispenses it as chickens eat. Unlike open trays, tube feeders limit waste because feed only flows to the bottom opening in small amounts. Look for a feeder with an anti-scratch lip at the base, since that single feature can cut feed waste by half. Position the feeder at the height of your chickens’ backs so they eat at a comfortable angle without tossing feed to the ground.
Placement and Weather Protection
Both waterers and feeders need protection from the elements. Wet feed molds quickly and can make your flock sick. Frozen water lines in winter shut down automatic systems entirely. Place your waterer and feeder under the coop’s overhang or inside a covered section of the run. In cold climates, a heated base for the waterer prevents freezing without requiring you to carry warm water out every morning.
5. Planning for Easy Access: Doors, Hatches, and Coop Layout
No matter how well you set up the rest of your coop, you still need to get inside it regularly. Poor access design turns simple tasks like egg collection, deep cleaning, and health checks into awkward, time-consuming ordeals. Plan your access points intentionally, and every maintenance task becomes faster.
Egg Collection Hatches on the Outside
An exterior egg collection hatch lets you gather eggs without opening the main coop door or disturbing your flock. The hatch sits beside or below the nest boxes and opens from the outside with a simple latch. This design matters most in the morning, since you can collect eggs in under a minute without stepping into the coop at all. Make sure the hatch seal is tight enough to block drafts and predators, but light enough to open with one hand while you hold a basket.
Walk-In vs. Bend-Over Coop Design
Small prefabricated coops save space, but they often require you to crouch or reach in awkwardly to clean, adjust roosts, or check on sick birds. If your flock size justifies it, a walk-in coop design pays for itself in saved time and saved back pain over the years of use. For smaller setups, at least add a wide, full-length access panel on one side so that the interior is fully reachable without gymnastics.
Predator-Proof Latches That Stay Simple to Use
A latch that takes two hands and thirty seconds to open will frustrate you twice a day, every day. Choose hardware that is secure against predators but fast to operate for you. Slide-bolt latches with a secondary clip work well because they stop raccoons while remaining quick for humans. Test every latch you plan to use before you finalize the coop layout, and replace anything that feels stiff or overly complicated.
Conclusion
A low-maintenance chicken coop does not happen by accident. It comes from deliberate decisions made before your flock moves in. Choose a smart location, manage waste at the source, design a run that works with nature, automate your feeding and watering, and build access into every corner of your setup. Take these five steps seriously, and you will spend far less time on chores and far more time actually enjoying your backyard flock.